Wednesday, October 31, 2007

Tutorial: Halloween Paper Wings - Printer Free Version!

Happy Halloween!
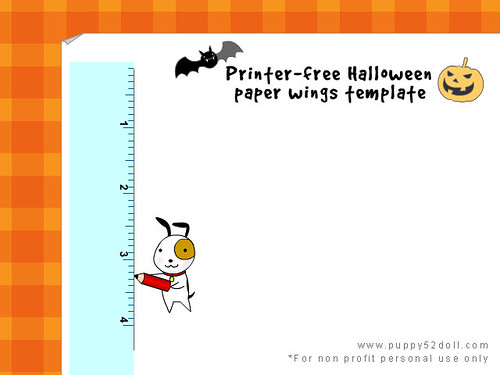
I realized that not everyone has a working printer at home, so I came up with a step by step tutorial to make a customized "printer-free" template if you wish to make some wings in a similar fashion from the previous tutorial. You can use your imagination to create some unique wings for your dolls, even after halloween! :)

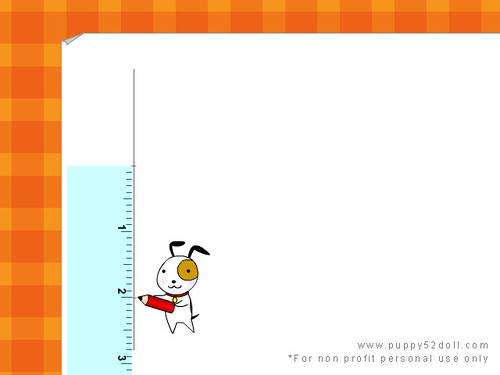
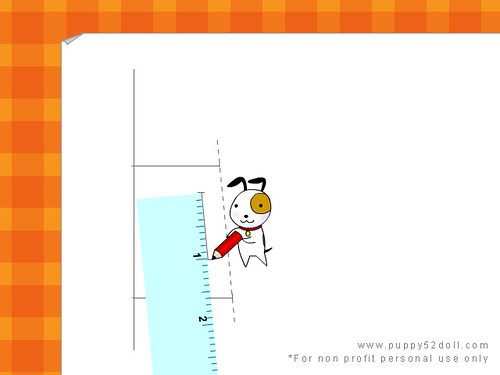
1) To make the template, draw a line using a ruler and pencil near the side of a piece of paper.


2) Make 2 markings of about 2 cm apart on first line, leave some space to draw the wing around later on.


3) Draw a line approximately 1.5 cm perpendicular to the first line, originating from the lower marking.


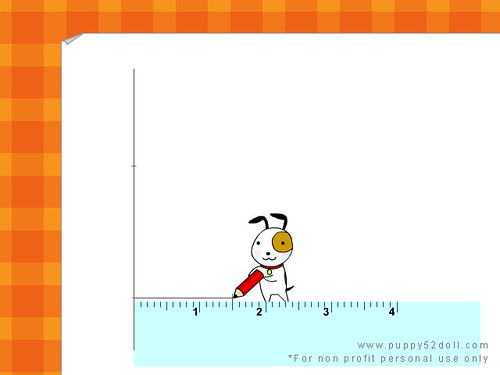
4) Draw a line approximately 1.3 cm perpendicular to the top marking of the first line.


5) Join the ends of the 2 shorter lines, you can draw dashes to represent a fold line later on.


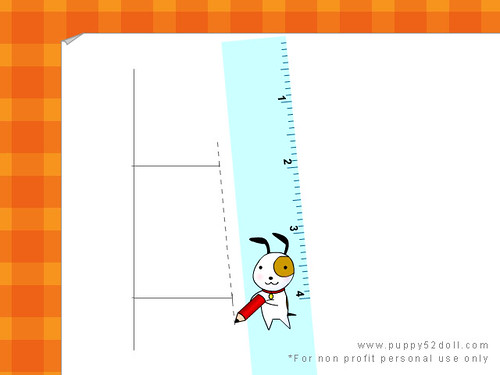
6) Draw a line about 1 cm long with 2 shorter strokes at the end to represent the "slits" to be made.


7) Draw shape of the wing you would like to create for your doll(s) It can be any other shapes you can think of :) Let your imagination run wild!


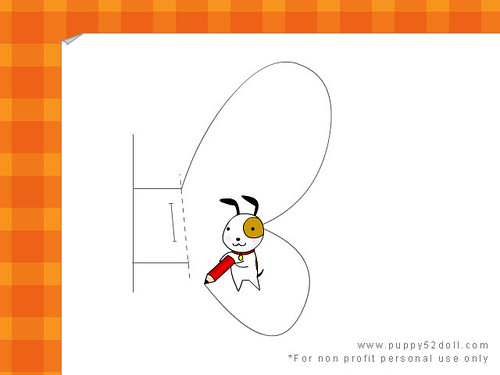
8) Now you have your very own paper template! It will be even more special, if you have created it using your own ideas ;)


9) Cut out the wing template and continue from step 3 of the previous tutorial!

Make some for your own dolls, or as a present for your friends' dolls! :D
Have a great Halloween!

Monday, October 8, 2007

Notice: Happy Thanksgiving!

Happy Thanksgiving!

We're currently housesitting, but have brought along the sewing machine, the weekend had been mostly moving a LOT of stuff and trying to sort stuff out :) Thank you for understanding!

Tuesday, October 2, 2007

News: Soft Launch, Blog style

Welcome to the "soft launch" of puppy52doll.com blog style :D
Hope you like our new look so far!

This is still a "soft launch" meaning that there could be more changes/revisions in future, if you had linked to us prior to this new look, please do not re-direct your links from puppy52doll.com!

The newest feature of the contents on site is a step by step tutorial, the first one for a Blythe Doll Camisole as seen after this post. I hope to add more in future, feedback are welcome!
http://puppy52doll.com/blog/images/pup_sewingmachine.gif
The coming weekend from the 5th to 8th is a long weekend for us in Canada, so I'll be mostly away from my desk, unable to sew, so please bear with me!

Tutorial: Sewing a Simple Camisole

This is a pattern for Blythes. It is one of the first patterns I made when I got my first blythe! The end product will fit Licca dolls or similar size dolls as well.

1) Save this pattern onto your computer, and print it out using a picture editing program.


2) To make sure your print out is the right size, measure with a ruler to check if the line near the fold line is 5.5 cm.


3) Cut pattern out.


4) Place fold line of pattern on fold of fabric.

5) Holding the pattern on the fabric, cut around fabric carefully with a sharp scissors around the pattern.
Important: do not cut the fold!

6) Variation: If you place the bottom of the pattern along the edge of the fabric which doesn't fray, you do not need to sew that part later on.
The edge of the fabric I used has a furry white trim for this instance, this variation can be applied on a fabric with a lace edge as well.

7) Sew zig zag stitch around the seam allowance, this helps prevents fraying.

If needed, trim off any excess "fly away" threads.

8) Tip: Before sewing the top stitching, press the seam allowances in place, this makes it easier to sew the top stitching.

When sewing a topstitch, use an unpicker to help tuck corners down where our fingers cannot.
Our fingers are too big to hold those tricky bits in place while it moves along under the pressure foot of the sewing machine.

Tip: Practice sewing very slowly on scraps of cotton before doing it on the actual piece.
Have your hand ready to stop the handwheel of the sewing machine especially when nearing the corner.

the other corner


This is how the front of the bodice should look like when top stitching completed.

9) Position the strap by aligning it closely to the paper pattern (for this case, we use a skinny satin ribbon for the strap) and secure it temporarily with a pin.

10) Hand stitch the strap in place.
Hand stitching is helpful for details which require precision.

11) Leave enough length as Halter ties, for a simple halter top and sew on fasteners - dolly velcro, or snaps.


Snaps are more commonly found in craft stores.

12) To attach the straps with precision, position each strap on the doll with pins. I would recommend sewing the fastenings at the back last.


Tops completed! :D Feel free to add lace or buttons, or even pockets as desired!

Final product on a blythe doll. Please note, this is just a "how to" and only one way to make a simple top, there is definitely many different way to make and present it. I hope it helps if you wish to try your hand at something simple for your blythe or licca dolls! :D