Dedicated to our santa's little helpers ;)
This pattern is made to fit blythes, feel free to adapt it for other dolls!
You will need to use fabrics with a slight stretch for this particular project. You can also make a sleeping cap from this pattern. Use your imagination! :D
1) Measure the circumference of the doll of your choice. Please note if you intend to make this for a mohair girl the measurement may vary.
I rounded off the measurement to 28cm.

2) With the information, we are ready to start drawing the pattern :)
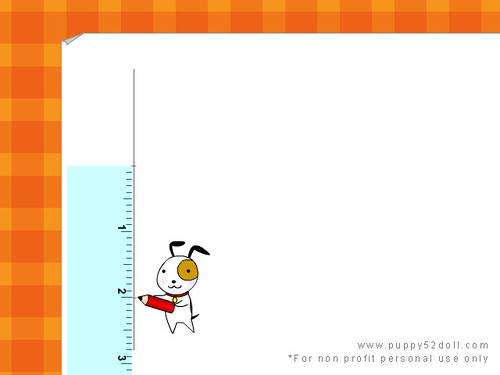
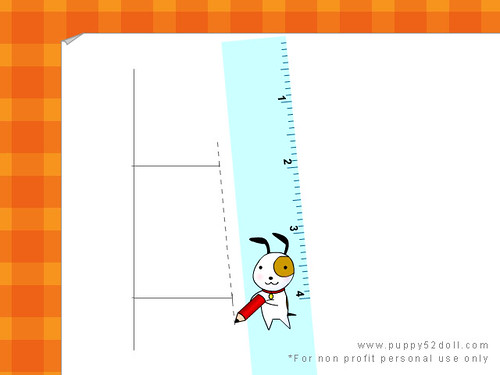
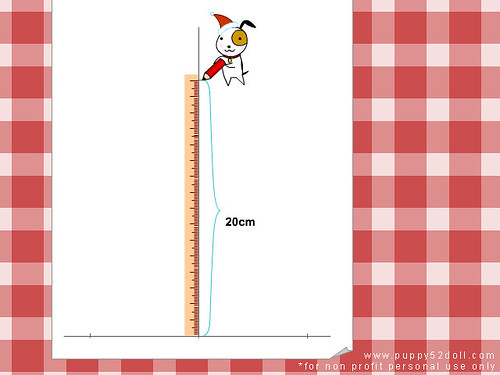
With a ruler and pencil, draw a line near to the bottom edge of an A4 (or letter size) paper.
3) Mark the line as follows 7cm is derived from 1/4 of the circumference measurement (28cm) I took.

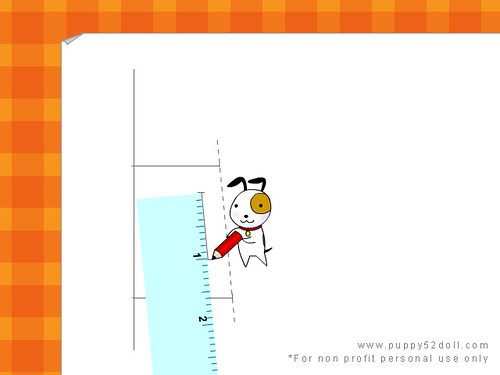
4) Draw a line perpendicular to the first line, from the middle marking, and make another marking about 20cm from the bottom line. Note, if you want a hat with a longer tip, make this marking more than 20cm.
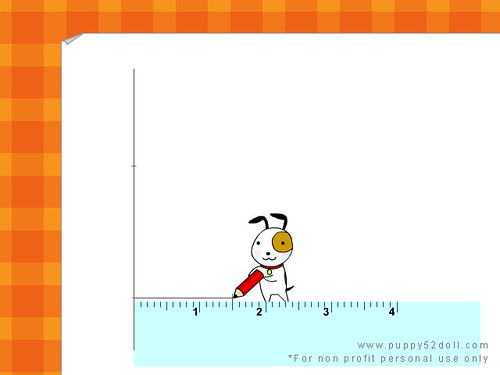
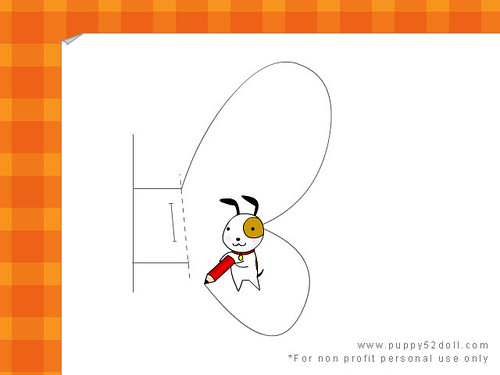
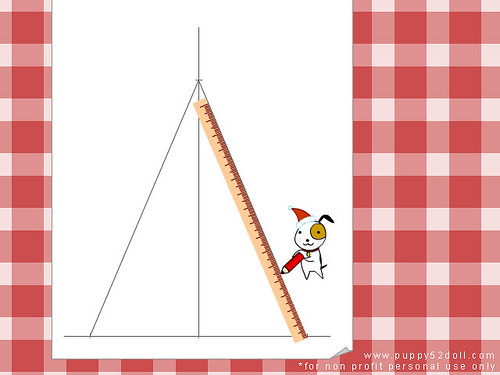
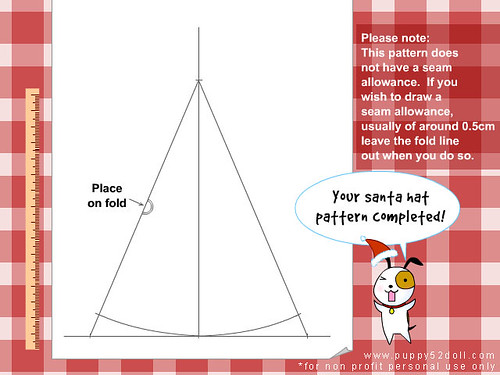
5) Join the markings as shown in the diagram below.
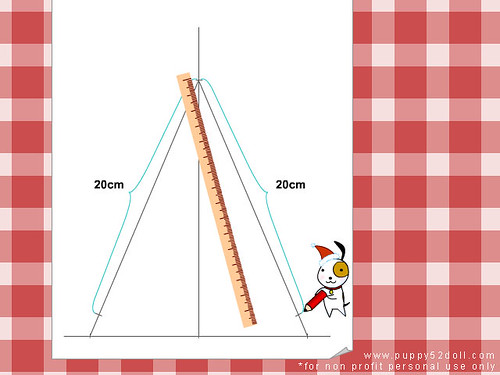
6) Make a marking for 20cm (Or the desired measurement you had decided upon) on each of the lines from the center.
7) Draw a curve line to join the marking as shown below, either by freehand, or have a curved ruler or you can also try to use a plate to help you.
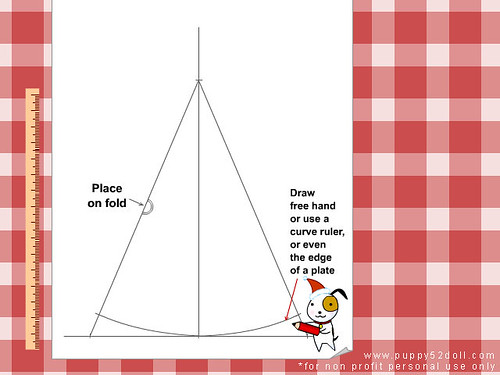
8) Template completed! Make a marking or note to determine a side to place on fold of the fabric you use. As mentioned on the diagram, this pattern does not have a seam allowance specified. If you wish to have a seam allowance to guide you, draw a marking around 05.cm around the edge, omitting the "fold line".
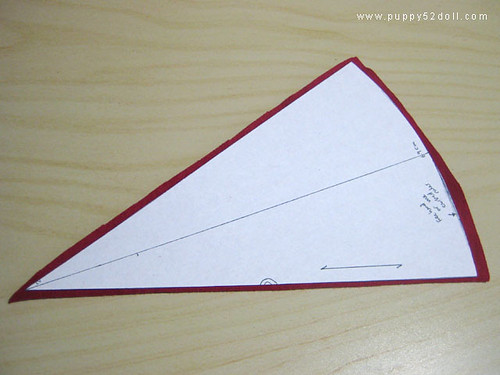
9) Position the pattern on fold of the red fabric.
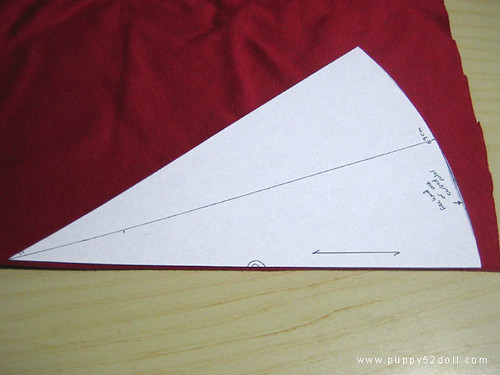
10) I leave a slight seam allowance as I cut the fabric. Remember not to cut the fold line of the fabric!
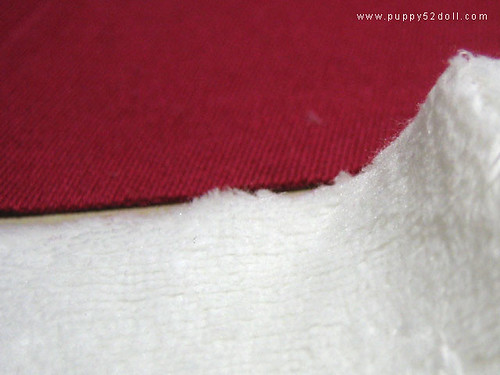
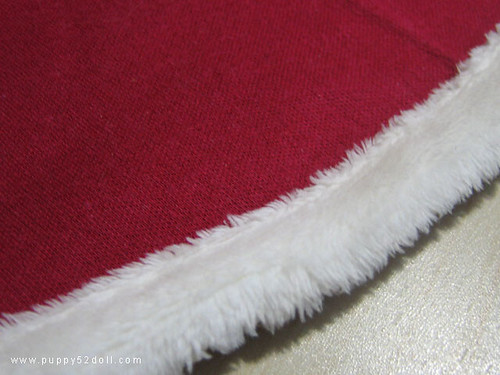
11) Open up the red fabric, and cut out a long strip of white fabric -- I used a furry stretchy white fabric, the width of the fabric is about 4cm wide, the length is longer than the circumference of the blythe hat.
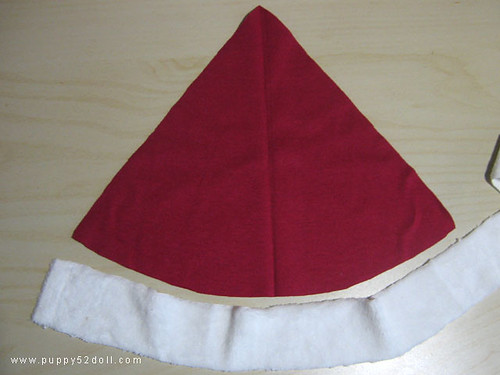
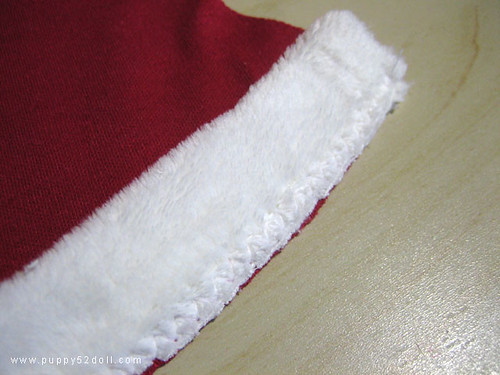
close up of the fabrics
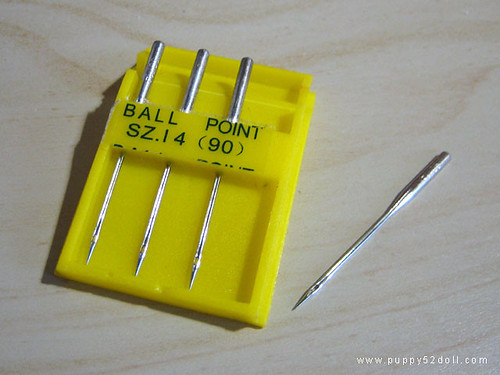
To sew with stretchy fabrics, use ball point needles for your machine to ensure best results!
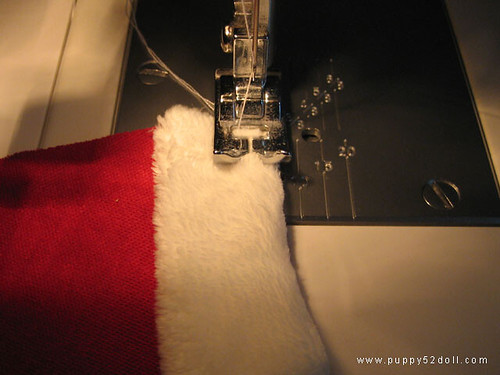
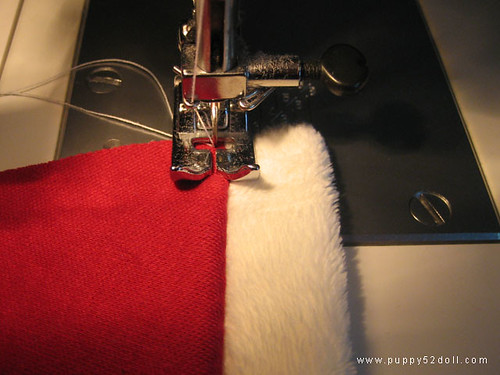
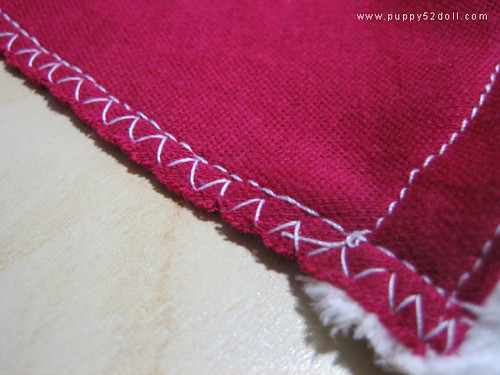
12) Fold the white fabric in half, with the right (furry) part facing outside and place the raw edges on the "wrong" side and curved end of the red fabric. Sew zig-zag to the end of the curve of the red fabric.
Note: This is the "wrong" side of the red fabric.
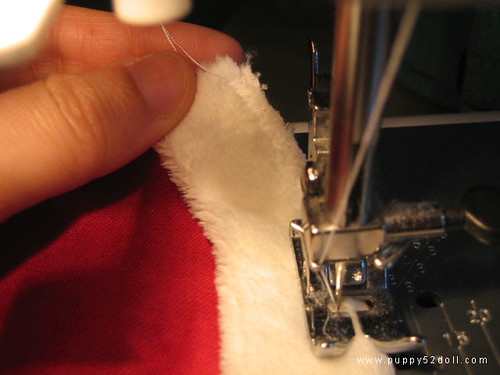
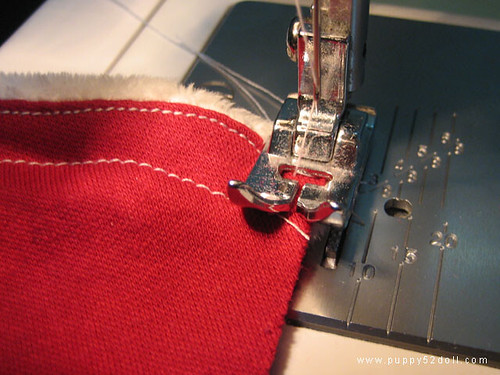
13) Fold the white fabric towards the "right" side of the red fabric, and sew a top stitch on the "wrong" side of the red fabric. This will join the seam allowance to the "right" side of the red fabric.

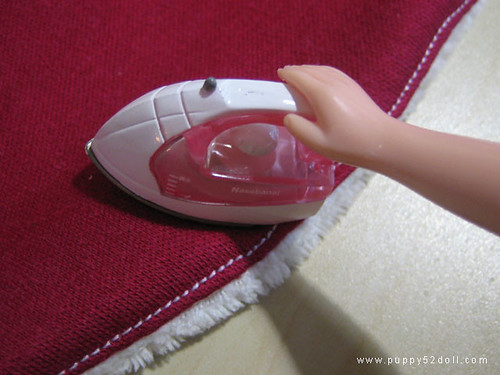
14) Fold the white strip such that it sits on the "right" side of the red fabric, and press with an iron.
15) Sew a top stitch by hand or machine to keep the furry end on the right side of the red fabric. Also hiding the seam allowance from step 12.
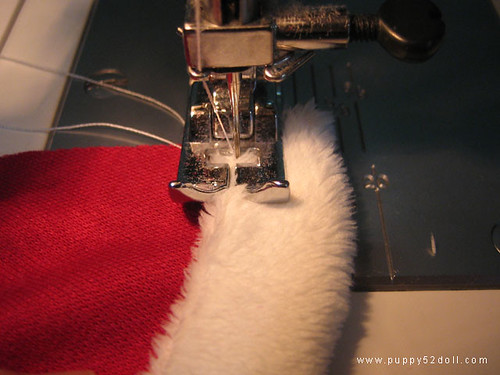
With a furry fabric, the top stitching is not too obvious
16) Fold the red fabric such that the "wrong" side is facing outwards. The white strip is inside the folded fabric.
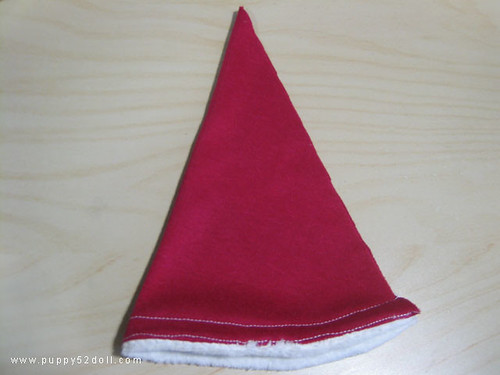
17) Join the hat together with zig zag stitch from the "mouth" of the hat -- where the white furry end is, to the peak of the hat.
Tip: to make sure the ends line up, you may wish to hand sew the end first before machine sewing.
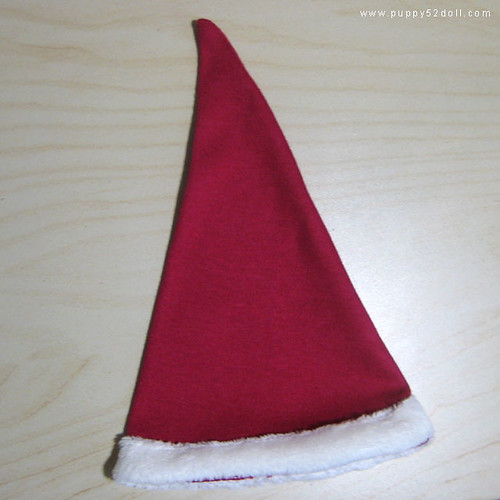
Almost complete!
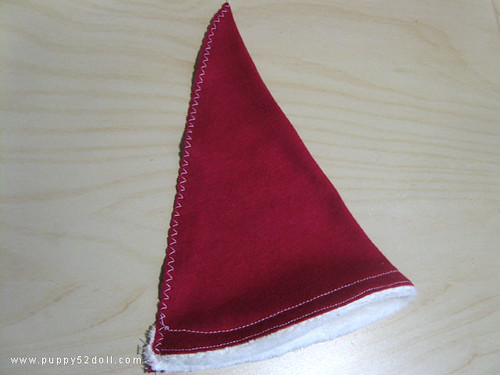
Optional stitch
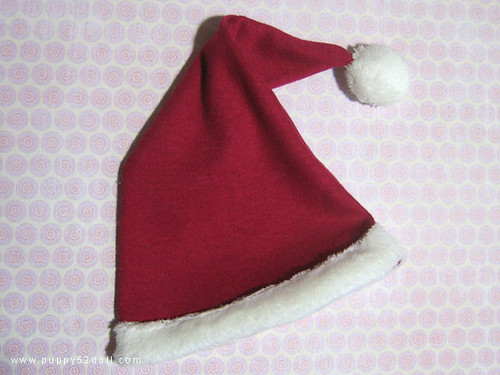
18) Almost done! Here's the hat, turned inside out such that the "right" side faces outside.
For the finishing touch, add a pompom, or a bell or who knows, a pull-ring to the tip of the peak. Or leave it as is :)
Wishing you all a very merry christmas from the puppy52 dolly household! :D
Hope you enjoyed the simple tutorials for this year!